カート
0
サインアップすると注文から 10 ドル割引になります
配達予定
1〜3日
こちらもおススメ


デンマークの会社

TL;DR:
- Proper gear choice and setup routines are essential for comfortable outdoor seating on various terrains.
- Practice at home on different surfaces enhances speed and stability during outdoor setup.
- Personalization of setup methods and gear ensures comfort and efficiency in unpredictable outdoor conditions.
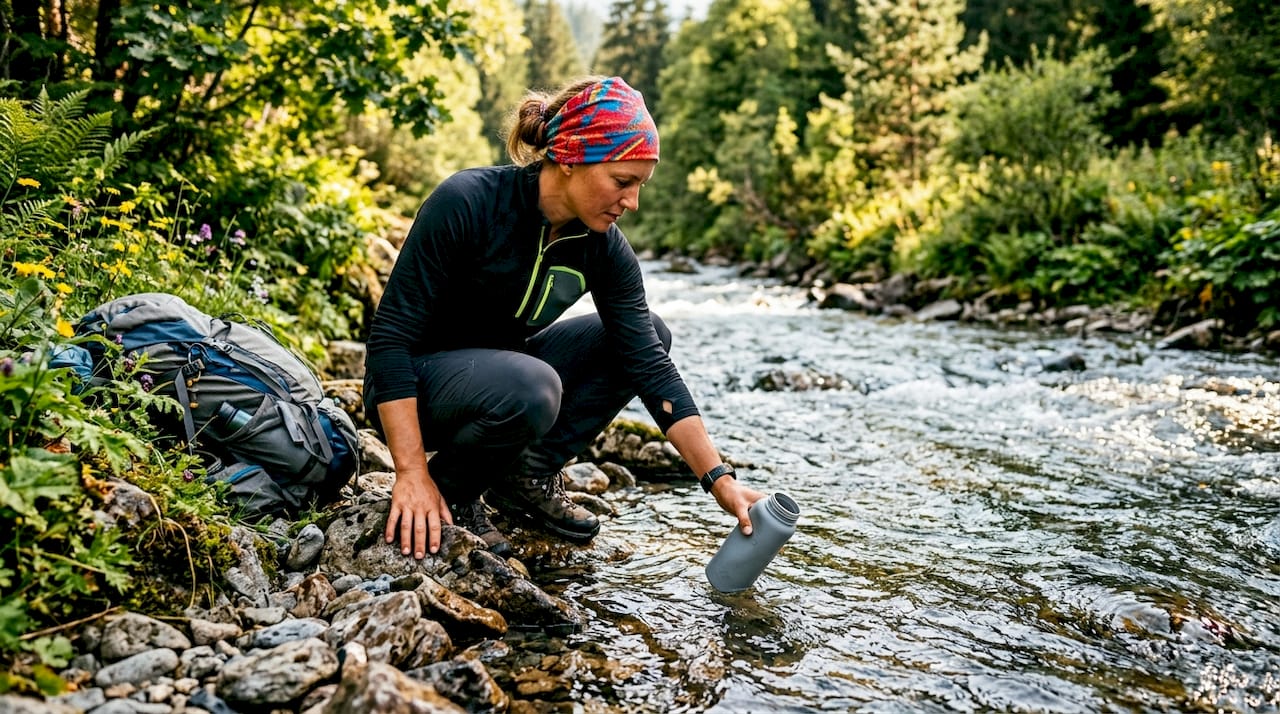
You’ve just hiked two miles to the perfect lakeside spot, your legs are screaming, and all you want to do is sit down. But your chair is buried at the bottom of your pack, the ground is a swampy mess, and the wind has decided to be your nemesis. Sound familiar? Getting your portable seating sorted quickly and comfortably isn’t just a nice-to-have—it’s the difference between enjoying your adventure and fighting it. This guide walks you through a proven, step-by-step workflow for setting up lightweight, ergonomic outdoor seating in any environment, so you spend less time fussing and more time actually relaxing.
| Point | Details |
|---|---|
| Assess terrain first | Choosing the right gear for your environment avoids common seating pitfalls. |
| Practice setup at home | Dry-runs cut actual setup time by up to 20 percent and boost confidence outdoors. |
| Troubleshoot with accessories | Wide feet, pads, and paracord help handle mud, wind, or uneven ground quickly. |
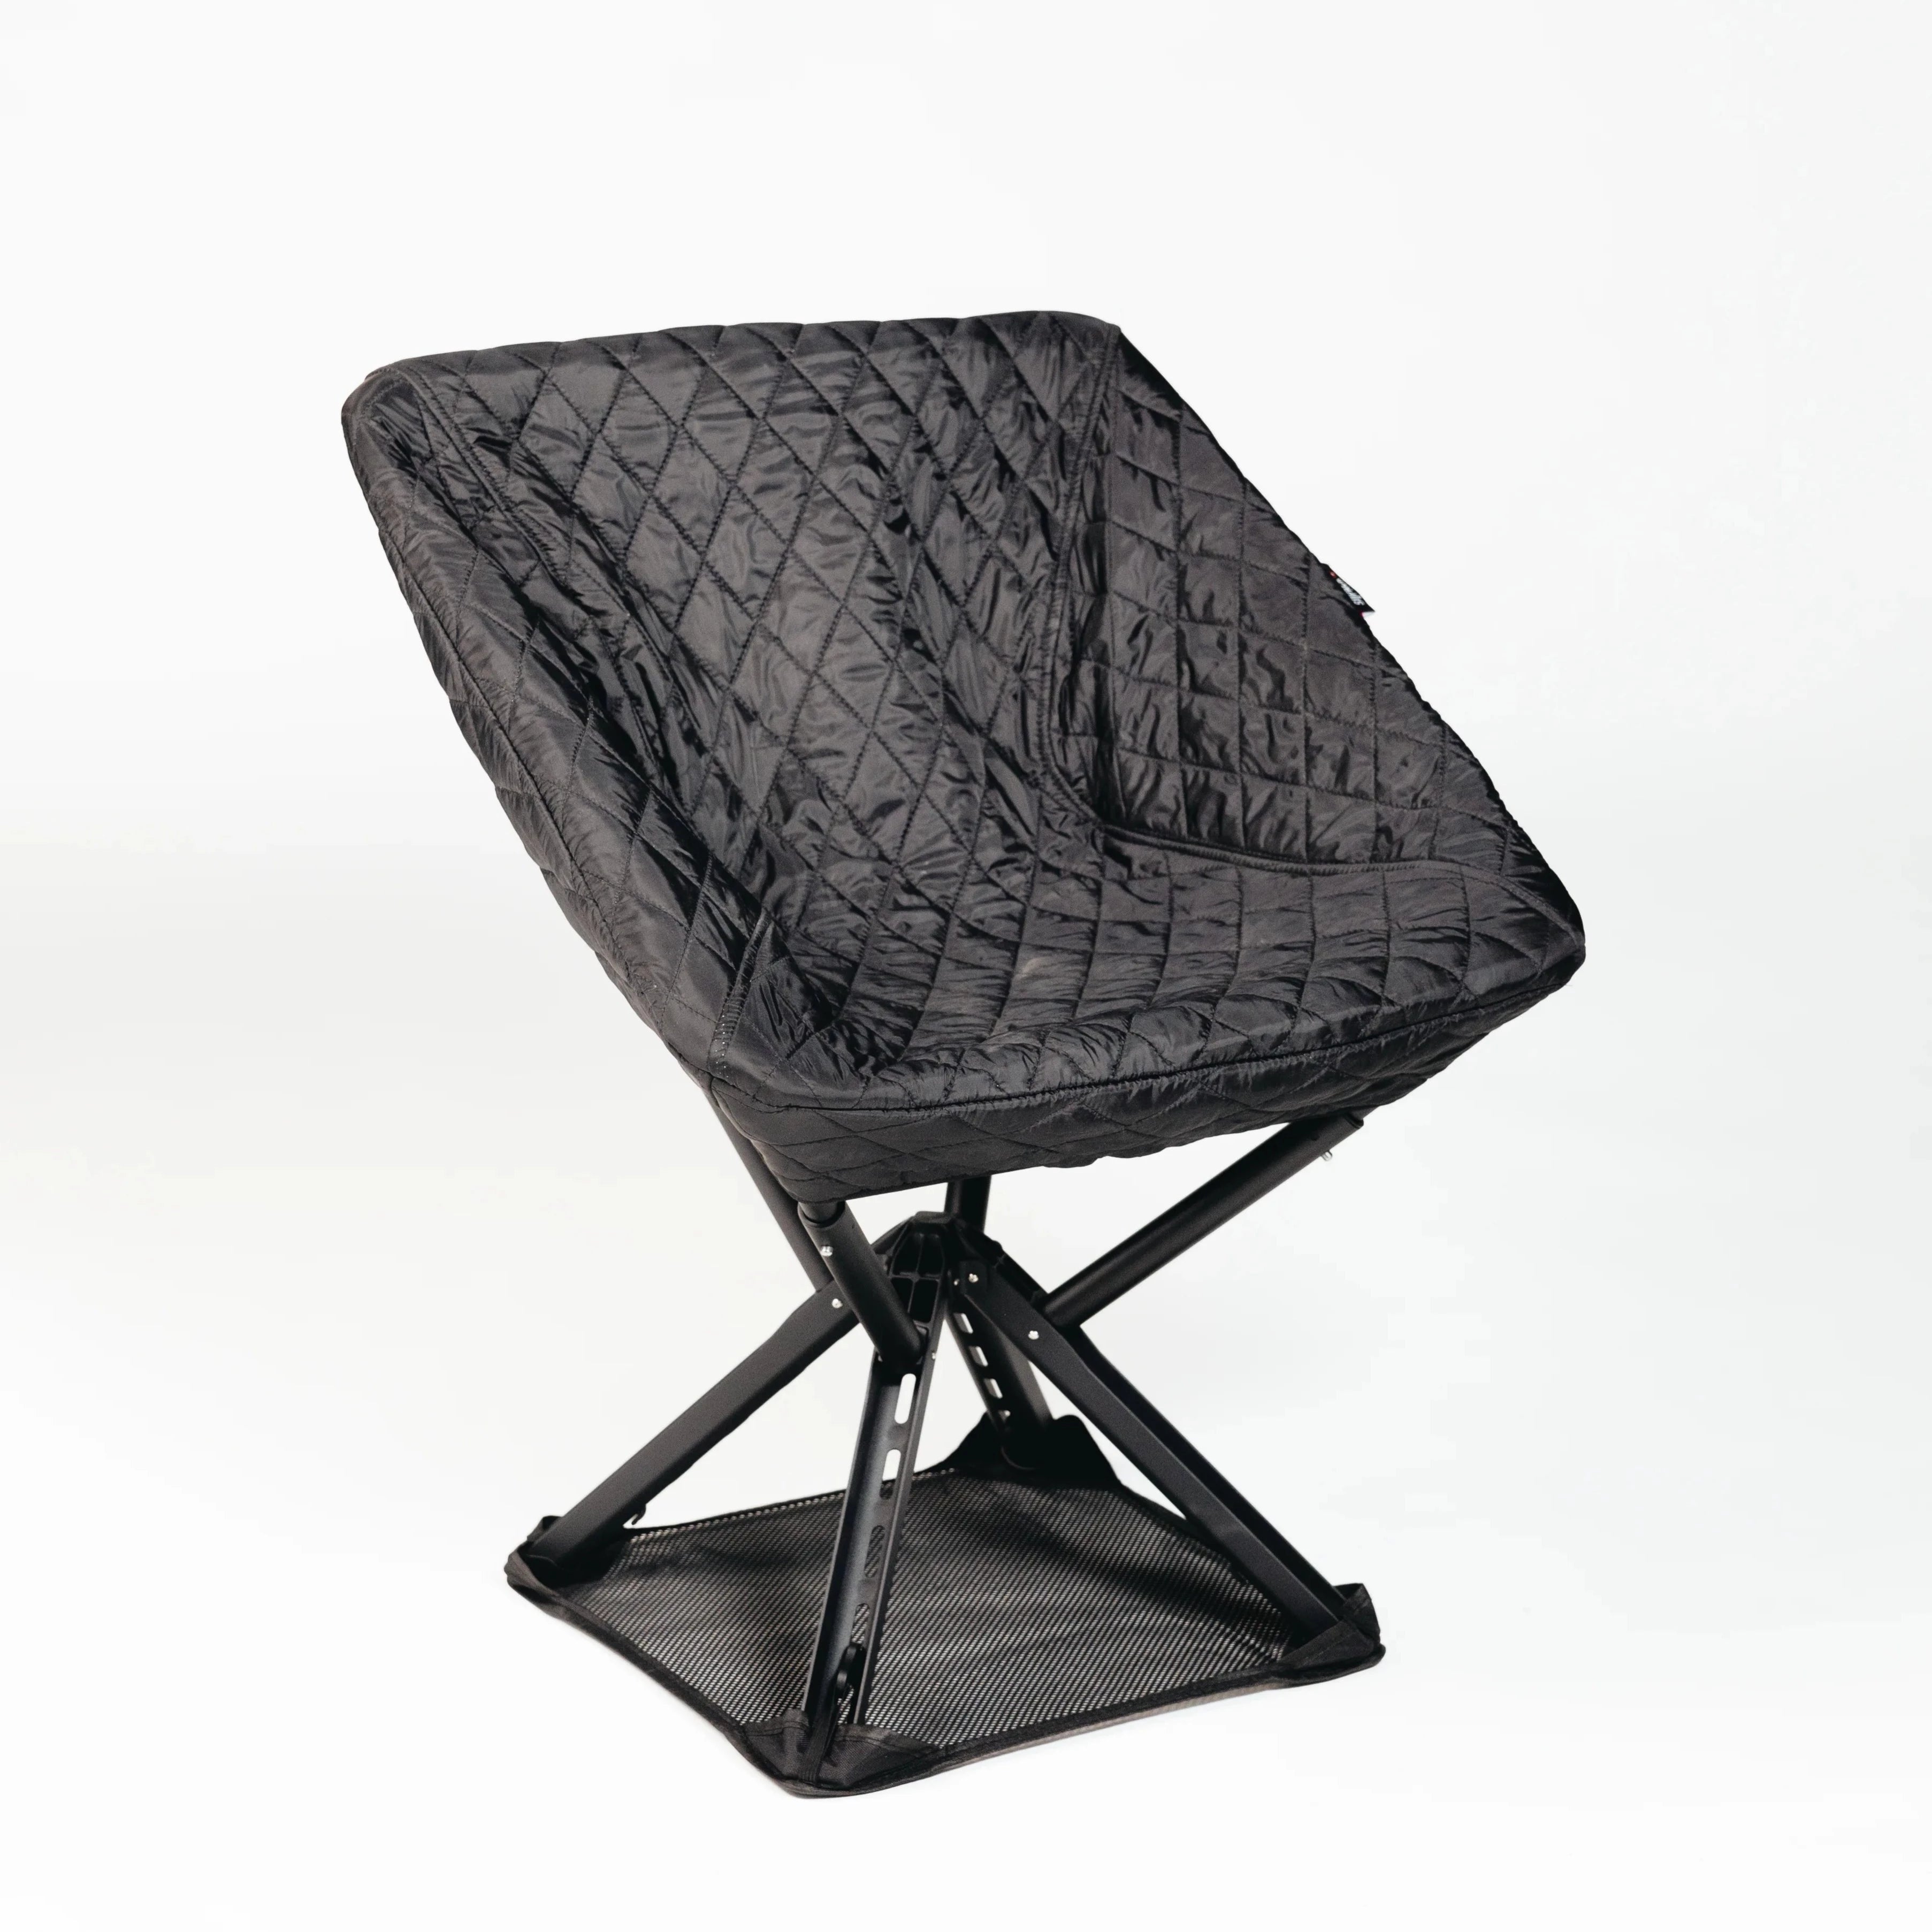
| Prioritize ergonomics | Selecting seating with adjustable height and support means true comfort all day. |
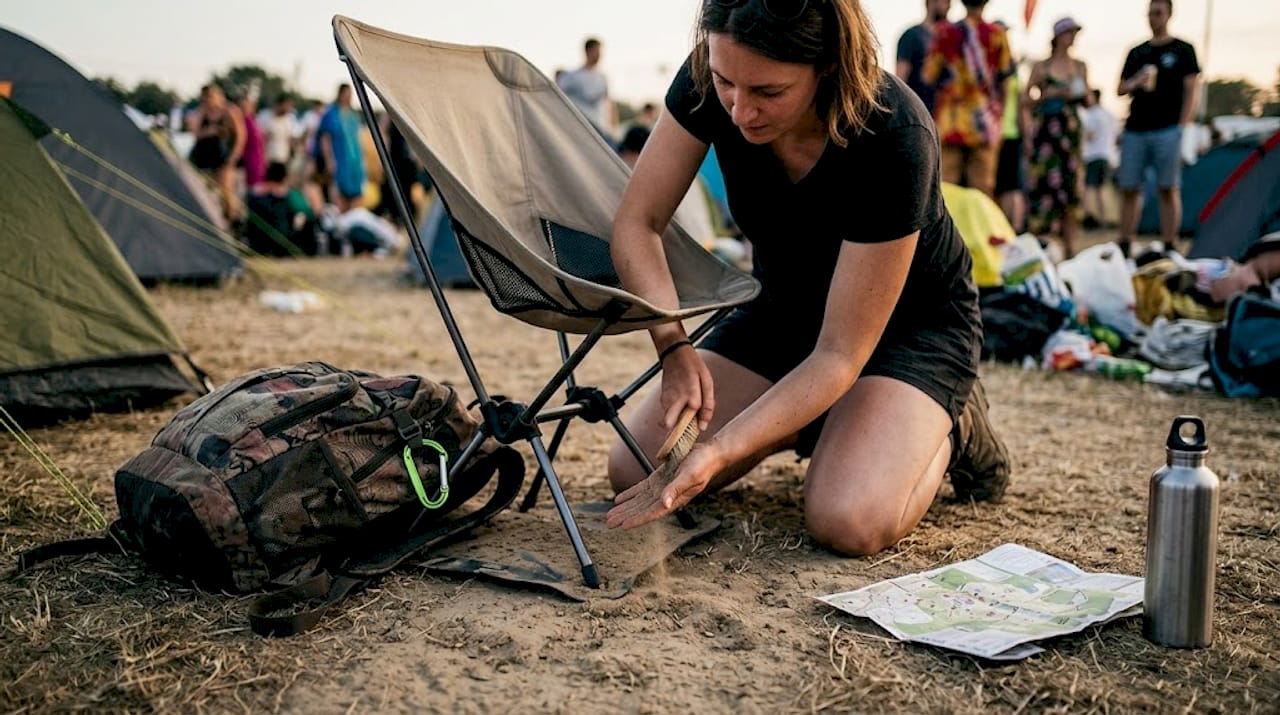
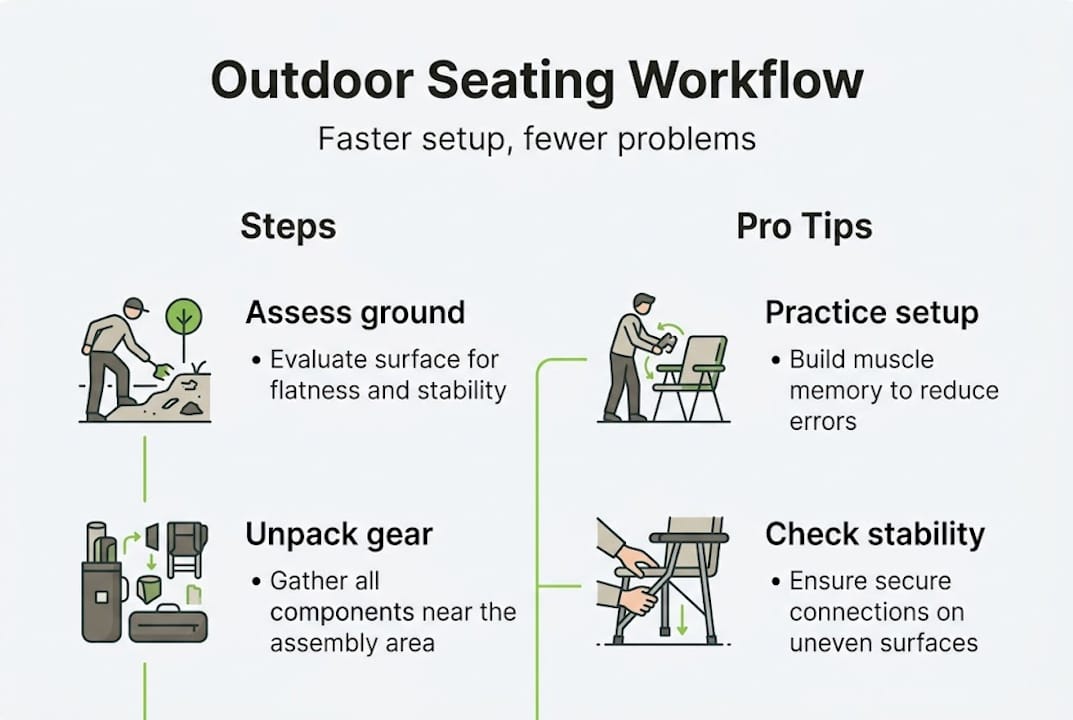
Before you even unzip your pack, take thirty seconds to read the terrain. Seriously, just look around. Is the ground soft and sandy? Rocky and uneven? Wet from last night’s rain? Each surface has its own personality, and your seating setup needs to match it. Getting this right upfront saves you from the frustrating shuffle of repositioning your chair three times before you finally get comfortable.
Here’s a quick-reference table to match your terrain to the right gear and accessories:
| Terrain | Key gear | Accessories to add |
|---|---|---|
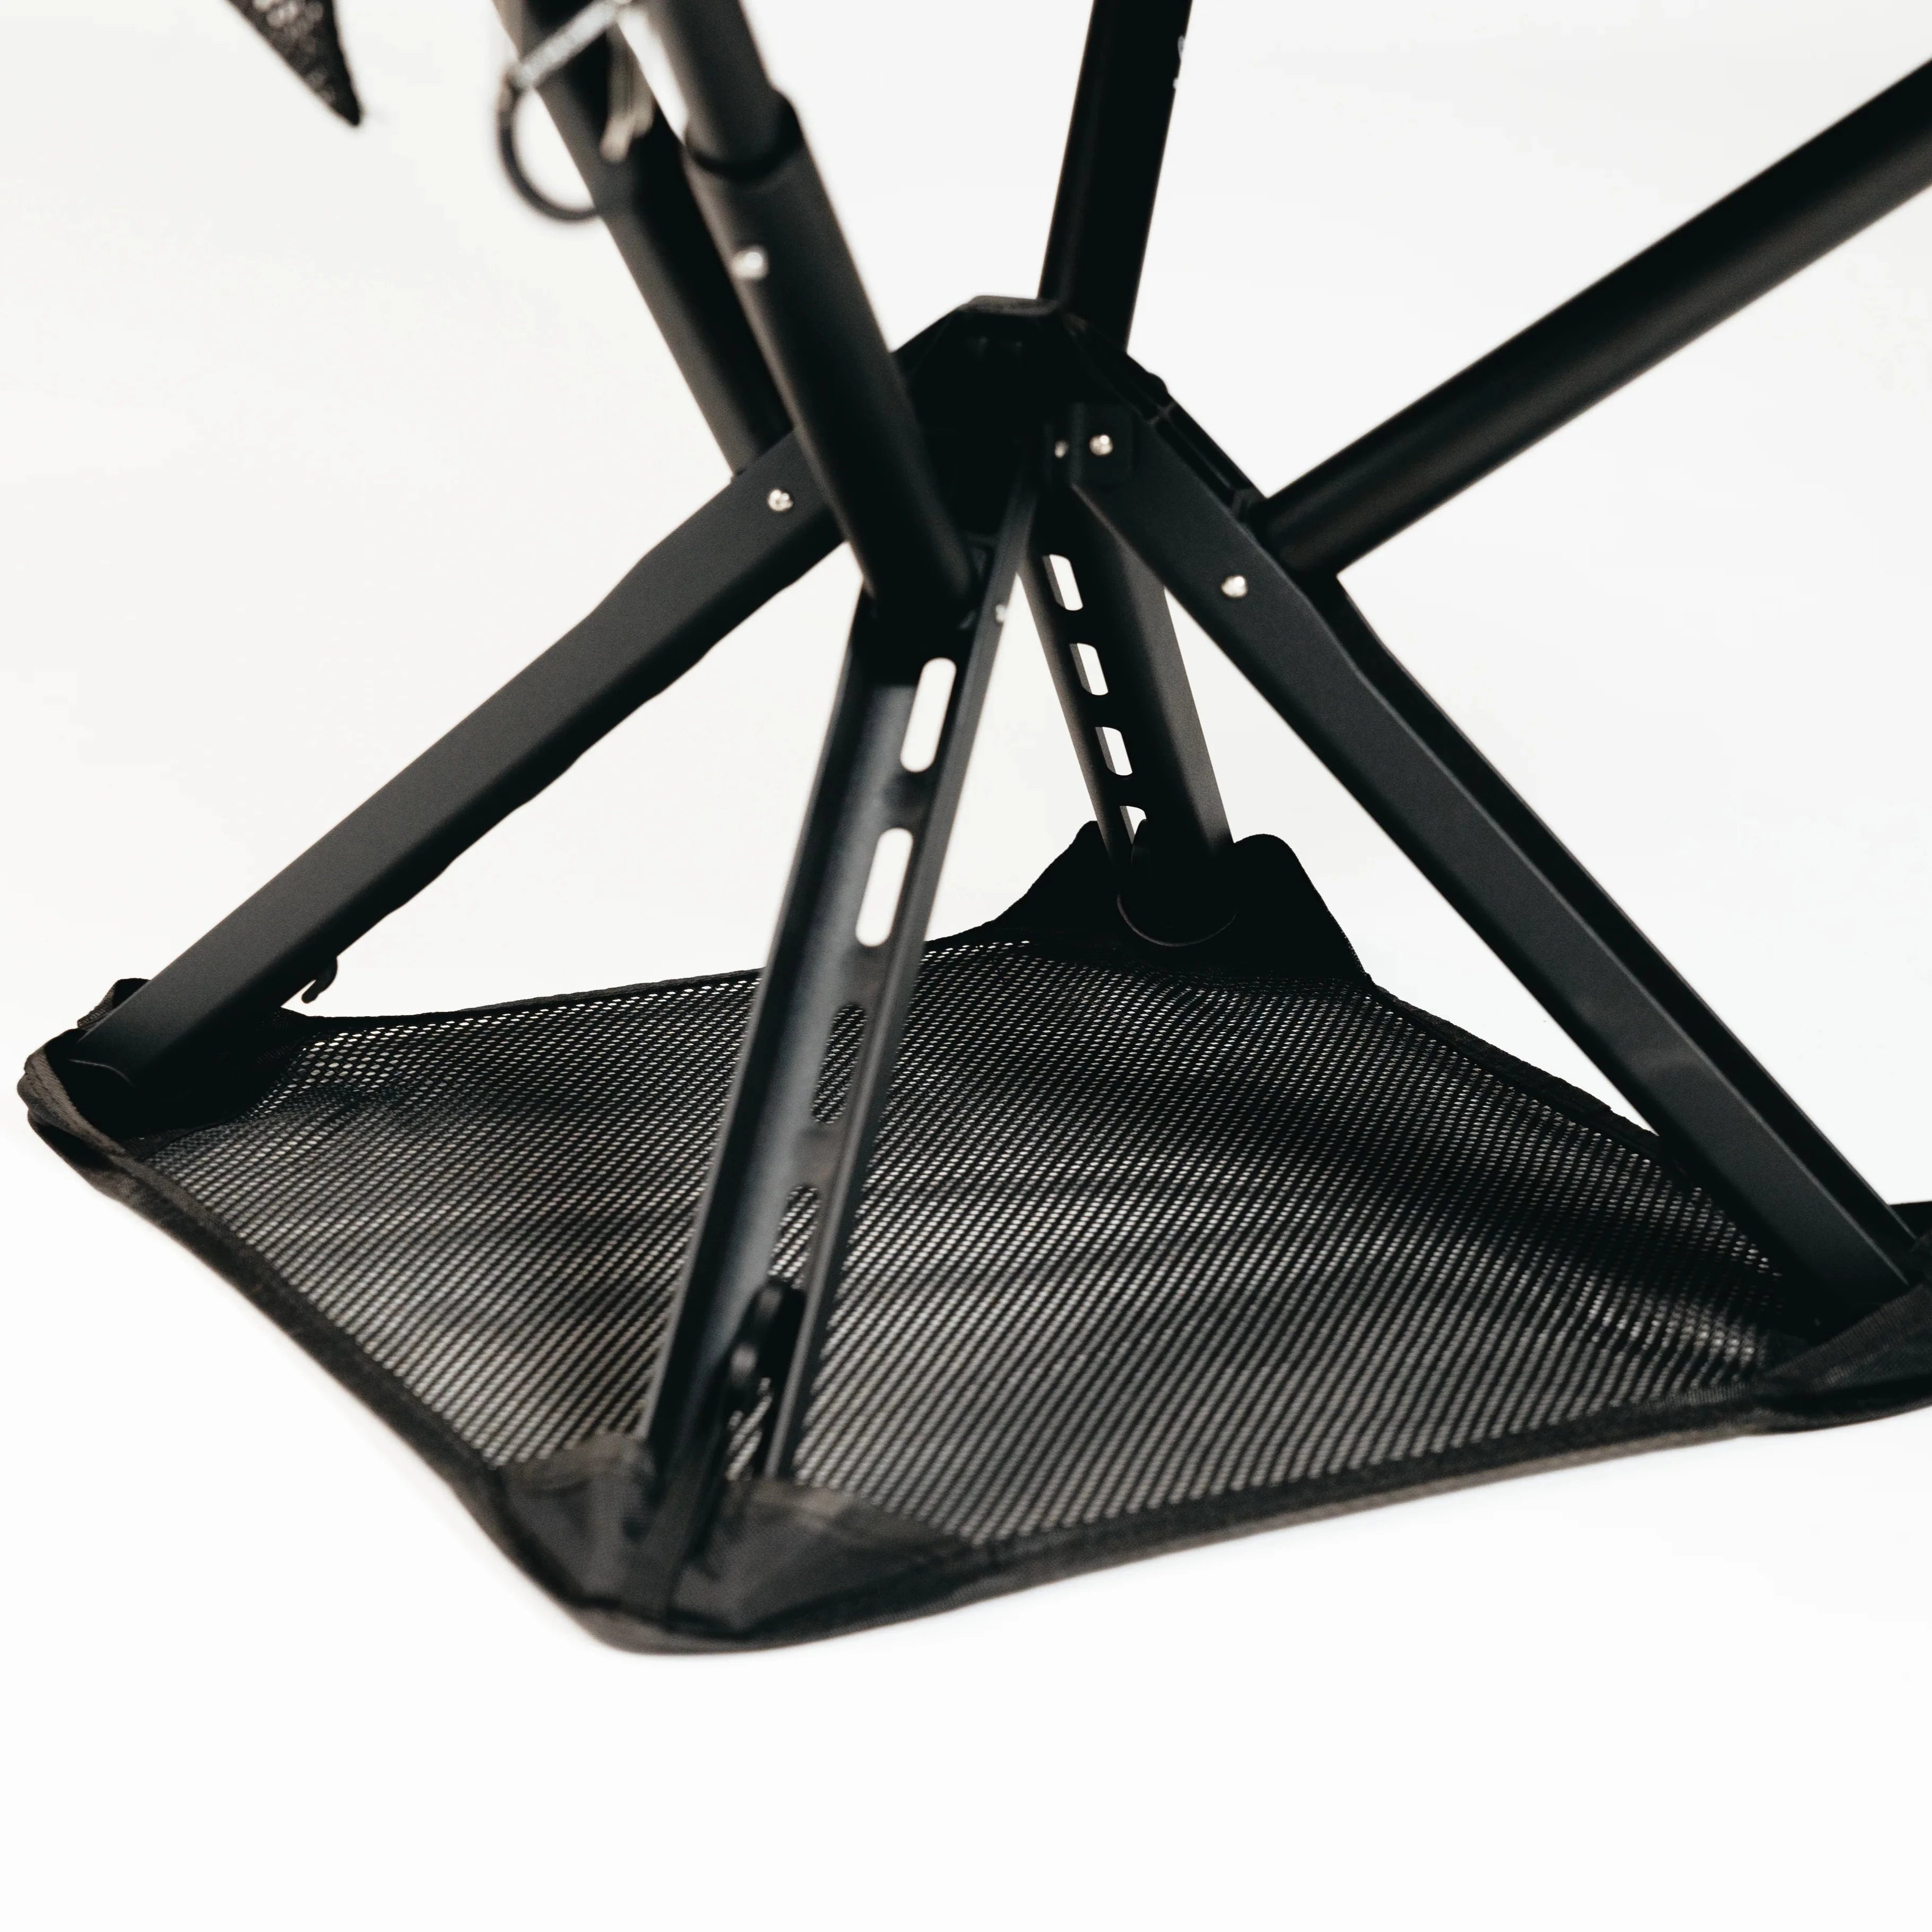
| Sand or mud | Wide-footed chair | Ground plates, groundsheet |
| Grass or soil | Standard portable chair | Stabilizer pads |
| Rocky surfaces | Low-profile or tripod chair | Non-slip foot caps |
| Wet ground | Waterproof seat | Thermal seat pad, groundsheet |
| Hard surfaces (concrete, wood) | Any chair | Rubber foot caps |
Selecting seats with wide feet or adding plates prevents sinking on soft surfaces, which is the number one complaint we hear from festival-goers and beach campers alike. A chair that slowly swallows itself into the sand is nobody’s idea of a good time.
When evaluating your gear options, prioritize these ergonomic features:
For more on picking the right chair for your style of adventure, check out these outdoor seating tips and this detailed seating buying guide that covers weight, materials, and portability tradeoffs.
Pro Tip: Set up your chair at home on different floor surfaces—tile, carpet, grass—before your trip. This lets you dial in the optimal height and stance without wasting time in the field.
Now that you’ve got the right gear for your environment, let’s break down the most efficient setup workflow step by step. Think of this as your repeatable playbook—nail it at home, and it becomes second nature in the field.
Safety note: Always confirm your chair is fully stable before sitting. A chair that tips under load on uneven ground can cause injury. That quick hand-press test is non-negotiable.
Practicing your setup at home can reduce deployment time by 20%, which adds up fast when you’re setting up camp in fading light or a sudden downpour.
Pro Tip: Pack a small zippered pouch with your setup essentials: a short length of paracord, a folded groundsheet, and a spare set of wide foot plates. Keep it clipped to the outside of your bag for instant access.
Even with a great workflow, outdoor setups can go sideways. Here’s how to troubleshoot and adapt on the fly when things don’t go according to plan.
| Issue | Quick fix |
|---|---|
| Chair sinking in sand or mud | Add wide plates or lay a groundsheet under the feet |
| Instability on rocky ground | Widen the leg stance; use non-slip caps |
| Tipping in wind | Clip to pack with paracord; stake to ground |
| Discomfort after 30 minutes | Adjust seat height; add a thermal or foam pad |
| Legs sinking unevenly | Rotate chair 90 degrees to find a flatter contact zone |
For uneven terrain, stabilize with wider leg stance or pads; for mud or sand, use wide plates or a groundsheet. These two fixes alone will solve about 80% of the problems you’ll encounter out there.
Here’s a quick troubleshooting checklist you can run through in under a minute:
For seating tips for tough conditions like festival mud pits or exposed alpine ridges, the principles stay the same: stabilize the base, protect from moisture, and secure against movement. The gear changes, but the logic doesn’t.
One underrated fix: if your knees ache after sitting, you almost certainly need a taller seat. Most people default to low camp chairs out of habit, but a seat height that lets your feet rest flat on the ground makes a huge difference on longer adventures.
With solutions for common problems in your toolkit, you can now fine-tune your workflow to maximize comfort and efficiency over time. This is where good becomes great.
Practicing different setups at home on varied terrain can cut your deployment time by 20%, and that stat is backed by real-world testing, not just theory. Twenty percent might sound modest, but when you’re racing the sunset to get camp sorted, those saved minutes feel enormous.
For ongoing performance, check your chair after every five or six outings. Look for fabric fraying, bent poles, or loose rivets. Catching small issues early keeps your gear reliable for years. You can also use the master seating workflow as a reference checklist to verify your process is still optimized as your gear evolves.
The goal is a setup routine so smooth it becomes automatic. When parking your posterior is effortless, you’re free to focus on the view, the campfire, or whatever cold beverage you’ve earned.
Here’s the uncomfortable truth: most setup advice online is generic to the point of uselessness. “Find a flat spot” and “test before you sit” are fine starting points, but they don’t account for the actual chaos of real outdoor conditions. Rain, mud, wind, and exhaustion don’t care about your checklist.
After field testing seating in everything from soggy Scottish highlands to sun-baked festival grounds, the biggest lesson is this: personalization beats optimization every time. Copying someone else’s exact setup often leads to discomfort or wasted time because their body, terrain, and conditions aren’t yours.
The workflows that actually hold up are the ones built around your specific body mechanics, your usual environments, and your gear’s quirks. That means investing time in home practice, not just reading about it. It also means accepting that comfort and portability involve real tradeoffs, and the right balance is personal.
Stop chasing the “perfect” universal setup. Build yours instead.
Mastering your setup workflow is only half the equation. The other half is having gear that actually cooperates. Sitpack designs portable seating with exactly this kind of workflow in mind: lightweight frames, intuitive folding mechanisms, and accessories that slot into your process without friction.
Whether you’re a weekend festival warrior or a serious backcountry traveler, Sitpack seating solutions are built to match the way you actually move and sit outdoors. From the ultra-compact Sitpack Zen to the versatile Campster II, every product is designed to set up fast, feel great, and pack away without a fight. Explore the full range and find the chair that fits your workflow, your terrain, and your adventure style.
Wide feet or ground plates are essential to prevent sinking in soft sand or mud. Without them, even a solid chair will slowly disappear into the ground.
Practice your setup at home on different surfaces—cutting deployment time by 20% is a realistic and well-documented result of consistent home drills.
Use a wider leg stance or stabilizer pads and adjust until the seat sits flat and secure before committing your full weight.
A modular or adjustable chair with attachable accessories adapts best to multiple environments, since one fixed design rarely handles every terrain equally well.
Clip chairs together with paracord or stake them to the ground, and position the chair’s back into the wind to reduce the sail effect.