Cart
0
Sign up and get 10$ off your order
Expected delivery
1-3 days
You may also like


Danish Company

TL;DR:
- Proper rest on the trail involves timed micro-breaks, body positioning, and insulating gear to maintain energy. Resting less than 20 minutes optimizes recovery, while longer breaks are counterproductive. Using lightweight, portable seating gear enhances comfort and recovery during every hike.
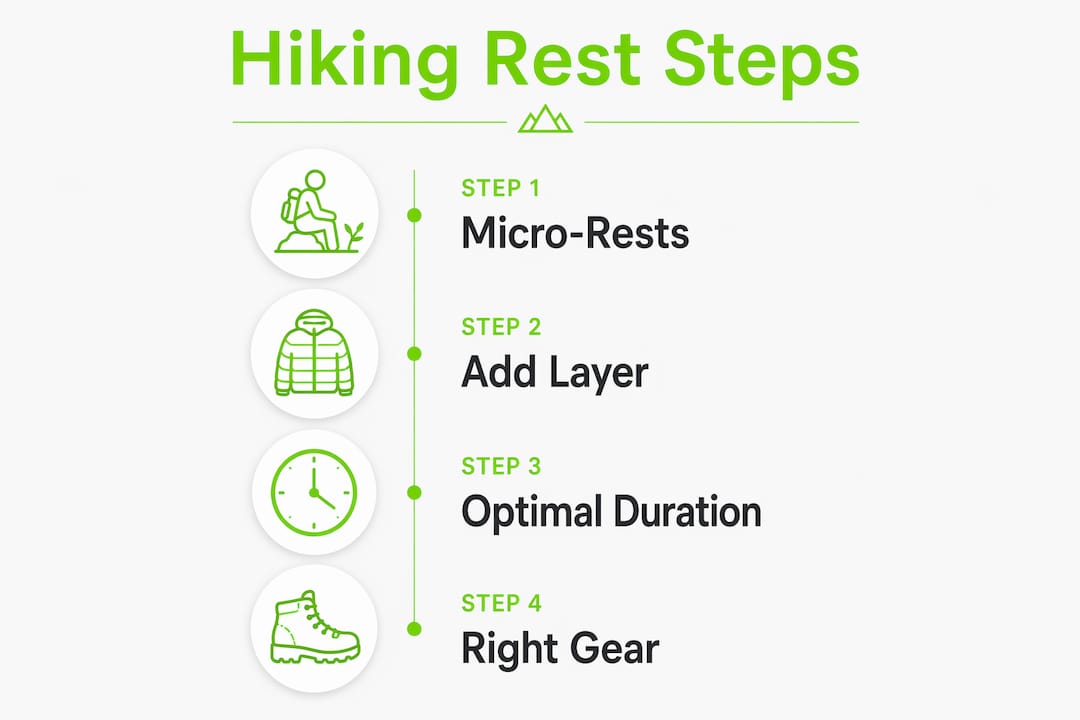
A hiking rest solutions guide is a practical framework for knowing when to stop, how to recover, and what gear to bring so your breaks actually restore you instead of just killing time. Most hikers treat rest as a sign of weakness or an afterthought. That mindset costs them energy, comfort, and enjoyment on the trail. The right approach treats rest as a proactive tool, not a reaction to exhaustion. Micro-rests, elevation techniques, portable seating like the Sitpack Campster II, and post-hike nutrition all work together to keep you moving stronger for longer.
Rest timing is not one-size-fits-all. No universal rest rule exists because terrain difficulty, personal fitness, weather, and stamina all shift the equation. That said, there are solid starting points you can adjust from.
On moderate terrain, 5–10 minute micro-rests every 30–45 minutes give your muscles a chance to clear lactic acid without letting your body cool down too much. On steep or technical terrain, shorten that interval to every 15–30 minutes. Flat, easy paths let you stretch breaks out to 45–60 minutes between stops, with a proper 15–30 minute lunch break in the middle of your day.
One principle worth knowing is the 20-minute rule. Resting longer than 20 minutes risks your body entering a physiological “done for the day” state, making it genuinely harder to get moving again. That is not just mental laziness. It is a real shift in how your muscles and nervous system respond. Keep your longer breaks purposeful and capped.
The table below maps terrain type to recommended rest intervals and durations so you can plan your hiking breaks before you hit the trail.
| Terrain type | Rest interval | Break duration |
|---|---|---|
| Flat, easy path | Every 45–60 min | 10–15 min |
| Moderate trail | Every 30–45 min | 5–10 min |
| Steep or technical | Every 15–30 min | 5–10 min |
| Lunch or meal break | Mid-day | 15–30 min |
Pro Tip: Listen for three body signals that tell you to stop sooner: shallow breathing that does not settle within two minutes of slowing down, a burning sensation in your quads that spreads to your knees, and a sudden loss of interest in the trail ahead. Any one of those is your cue to pause now rather than push for the next landmark.
Where and how you rest matters as much as when you rest. Parking yourself on a random rock mid-slope does not count as recovery. Choosing a flat, sheltered spot away from wind protects your body temperature and lets your muscles actually relax.
Lying down during breaks lowers your heart rate faster, reduces muscle fatigue, and improves blood flow. Elevating your feet above your heart level accelerates that process. Yes, it looks a little odd to passing hikers. Do it anyway. The physiological payoff is real, and your legs will thank you at mile 12.
Here are the core best practices for making every trail rest spot count:
Pro Tip: Before you stop, add a layer. Your body temperature drops within two minutes of halting. Pulling on a wind shell or fleece before you sit down prevents the muscle stiffness that makes restarting feel brutal.
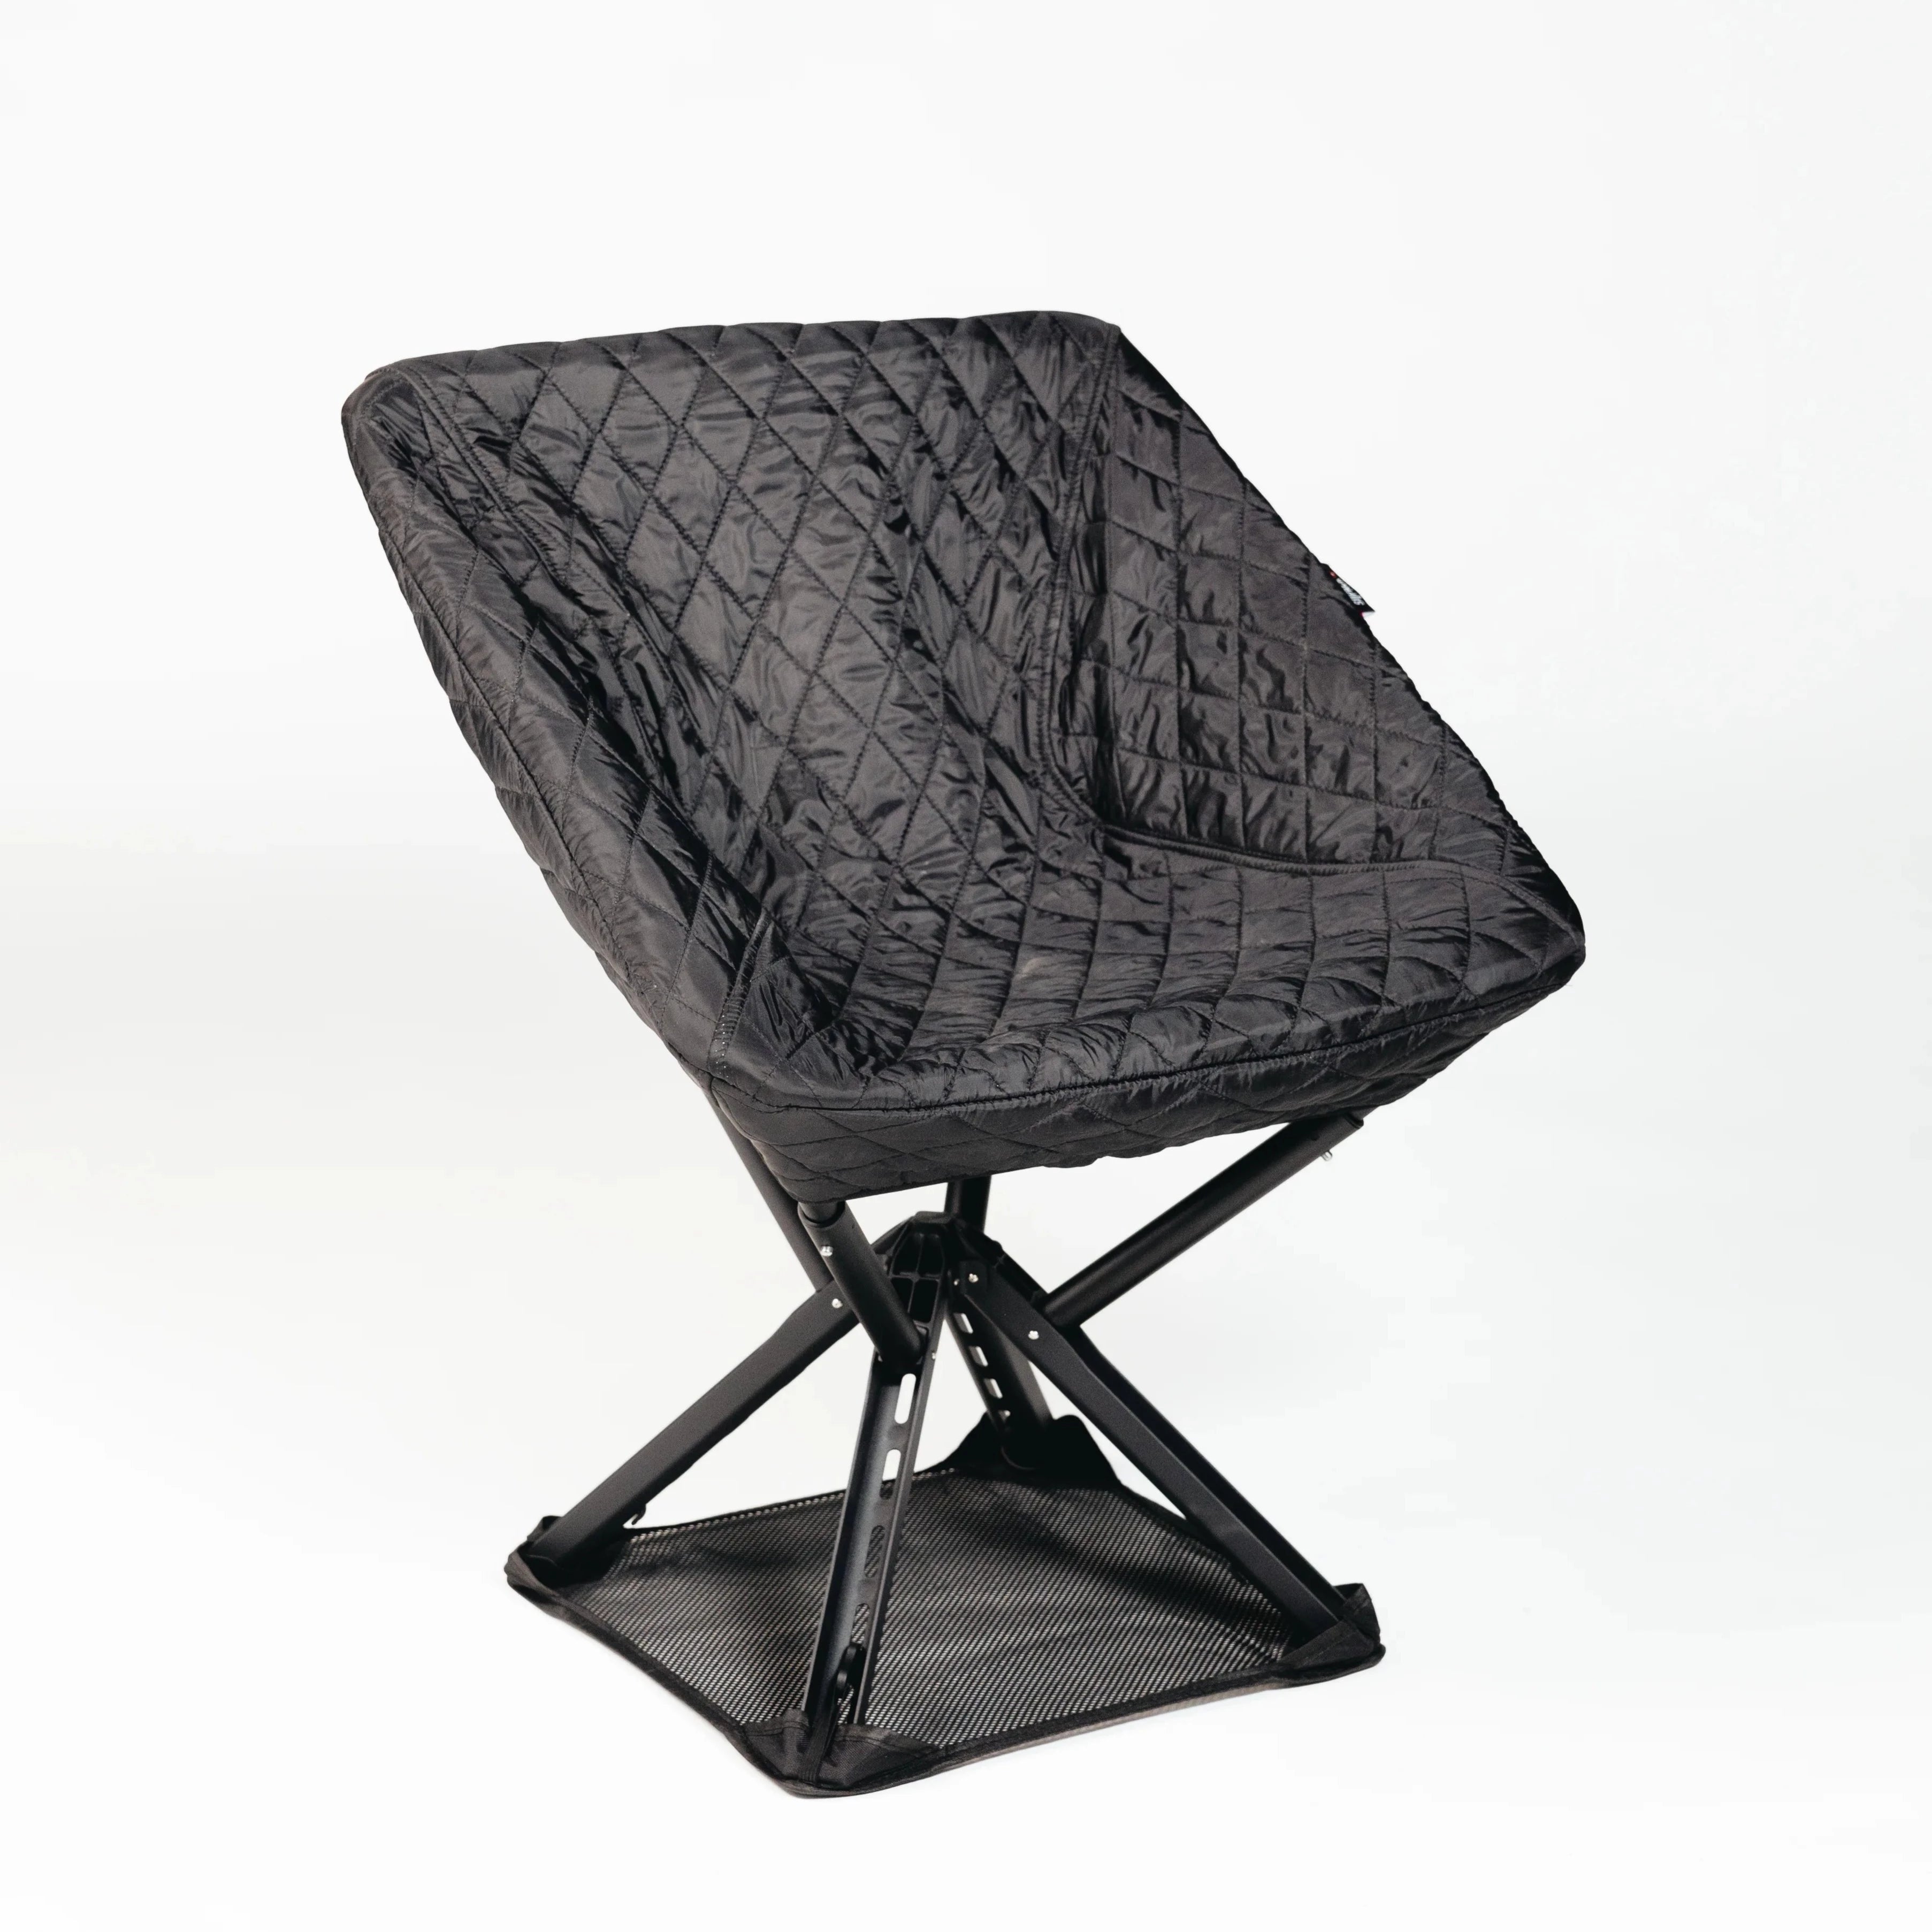
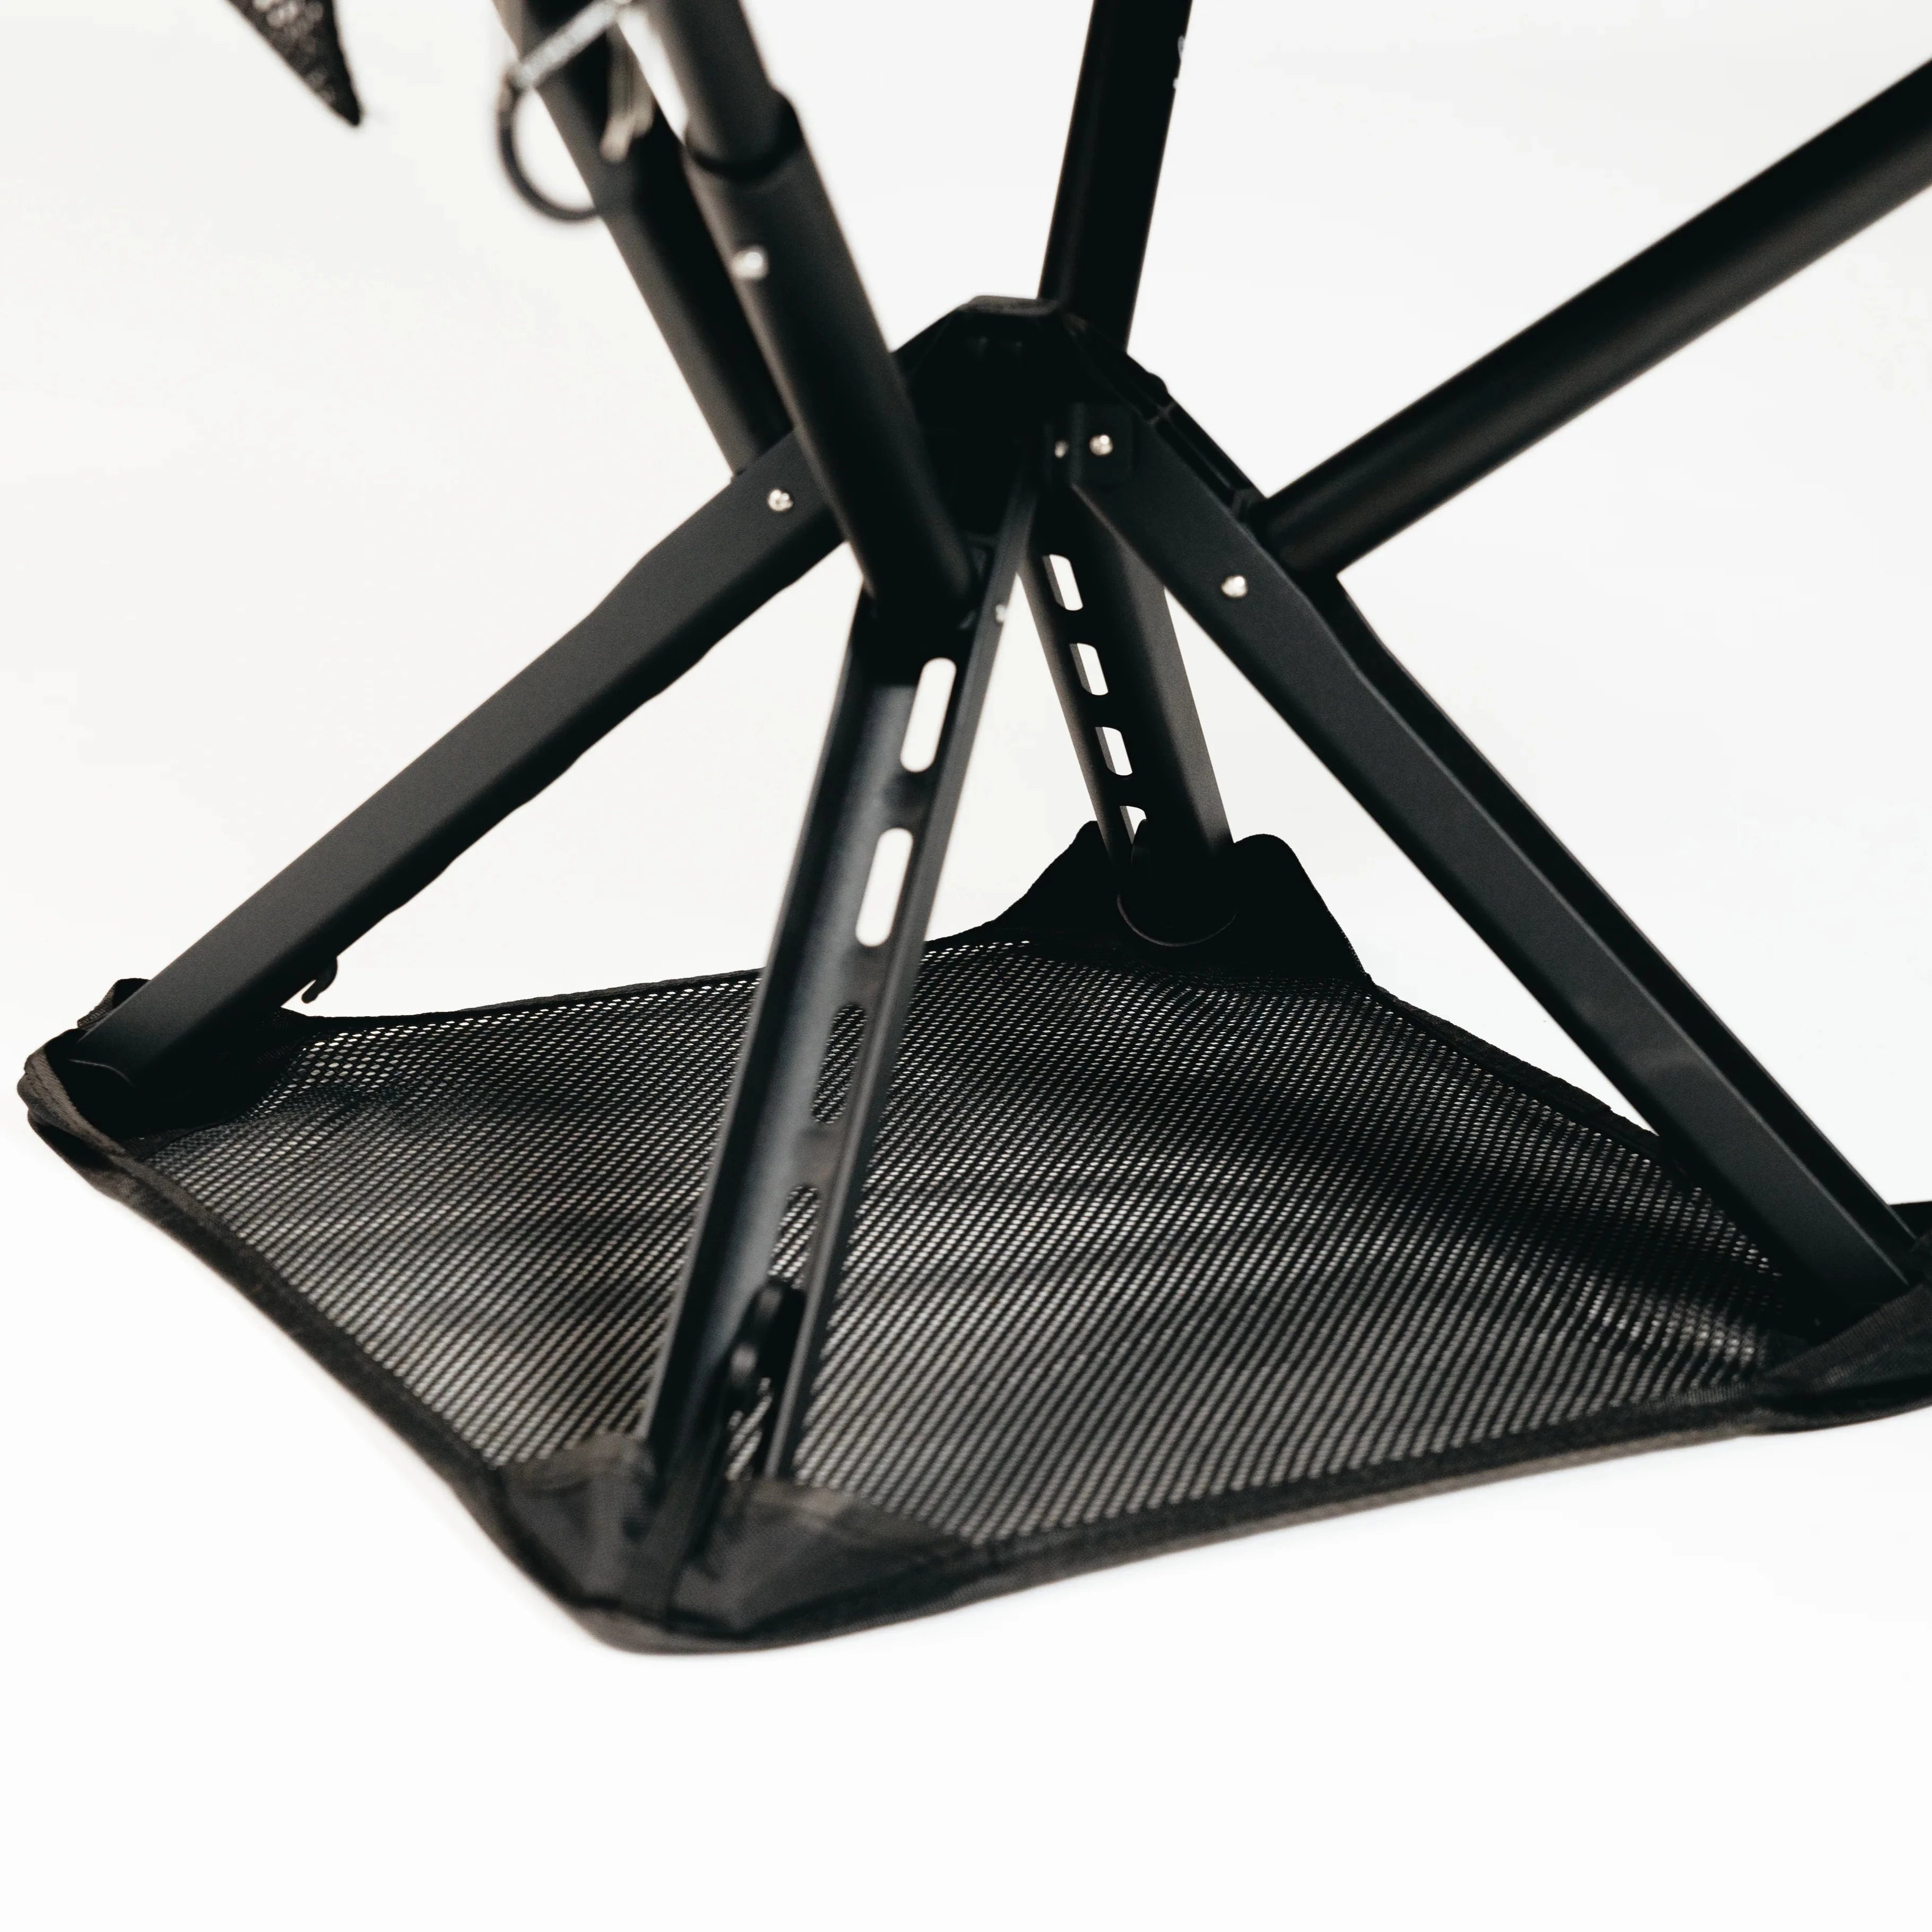
The right gear turns a mediocre break into genuine recovery. Lightweight, compact stools and sit pads significantly improve comfort on rest breaks by preventing stiffness and insulating you from cold ground. The key criteria when choosing hiking seating gear are weight, packability, comfort, and durability. A stool that weighs two pounds and takes three minutes to set up will stay in your car.
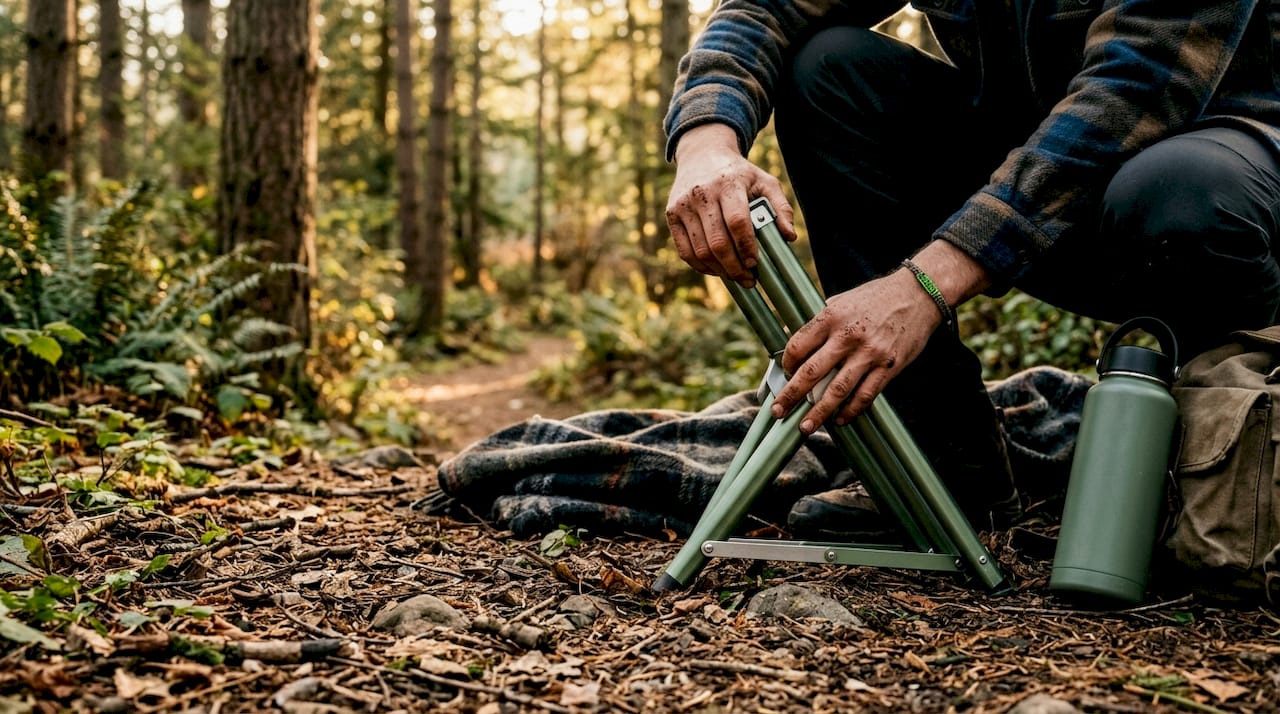
Telescoping stools fold down to fit inside or clip onto a pack. Foldable foam sit pads weigh almost nothing and slip under a pack lid. Multipurpose gear like the Sitpack Campster II combines a compact folding stool with a design built for quick deployment on any terrain. Check the portable seating checklist for a breakdown of comfort and eco-friendly picks worth considering.
Here is a comparison of common hiking rest gear types to help you choose:
| Gear type | Weight | Packability | Best for |
|---|---|---|---|
| Foam sit pad | Very light | Excellent | Quick ground insulation |
| Telescoping stool | Moderate | Good | Longer breaks, uneven ground |
| Foldable camp stool | Light to moderate | Very good | Day hikes, trail rest spots |
| Sitpack Campster II | Light | Excellent | Fast setup, any terrain |
Deploying seating gear efficiently matters on short breaks. Keep your stool clipped to the outside of your pack or in a top pocket so you can access it in under 30 seconds. A piece of gear buried at the bottom of your bag never gets used.
Post-hike recovery is where your body actually rebuilds. Muscle growth and endurance improvements happen during recovery, not during the hike itself. Treating the hour after you finish as part of the workout changes how you approach it.
Nutrition timing is the highest-leverage move. Consuming 20–25 g of protein and 0.8 g/kg of carbohydrates within 45 minutes of finishing maximizes muscle repair and glycogen resynthesis. Practical options include eggs on toast with a banana, chocolate milk, or a high-calorie freeze-dried meal if you are still in the backcountry. The window matters. Waiting two hours cuts the benefit significantly.
Here are the key hiking recovery strategies to run through after every serious outing:
One safety note: if you stopped during a hike because of pain, reduce your mileage by 10% for each day of rest before returning. Breaks over three days warrant a 50% mileage reduction on your return. Pain that persists at rest or changes how you walk requires medical attention, not just more recovery time.
Effective hiking rest combines timed micro-breaks, proper body positioning, insulating gear, and post-hike nutrition to sustain energy and reduce soreness across every mile.
| Point | Details |
|---|---|
| Time your breaks precisely | Take 5–10 minute micro-rests every 30–45 minutes on moderate terrain to maintain momentum. |
| Lie down and elevate | Feet-up rest lowers heart rate faster and improves circulation better than sitting upright. |
| Use insulating seating gear | A lightweight stool or sit pad prevents cold-ground stiffness and speeds up recovery. |
| Layer before you stop | Adding a wind shell before sitting down prevents muscle stiffness during static breaks. |
| Eat within 45 minutes post-hike | Protein and carbs in that window maximize muscle repair and glycogen resynthesis. |
I used to power through breaks, sitting on whatever rock was nearby for two minutes before pushing on. I thought stopping properly was something slower hikers did. That mindset cost me the back half of more hikes than I want to admit.
The shift happened when I started actually lying down during longer breaks. It feels ridiculous the first time. You are flat on your back on a trail with your feet propped on your pack, and other hikers give you a look. But the difference in how your legs feel when you stand back up is not subtle. Your heart rate drops, the burning in your quads fades, and you restart with actual energy instead of grim determination.
The gear upgrade that made the biggest practical difference was adding a compact folding stool to my kit. I resisted for years because I thought it was extra weight I did not need. Once I tried one, I realized I had been sitting on cold, uneven ground for years and calling it resting. A proper seat changes the quality of every break.
My honest advice: start with the timing. Get the 30–45 minute micro-rest habit locked in before you worry about gear. Once you feel the difference, you will naturally want the gear to support it. Rest is not a concession to the trail. It is the strategy that gets you to the end of it feeling good.
— Jonas
Good rest gear does not have to be heavy or complicated. Sitpack builds lightweight, foldable stools designed specifically for hikers who want a real seat without the bulk.
The Sitpack Campster II and Sitpack Zen both set up in seconds and clip onto any pack. They are built for the kind of seating comfort that turns a two-minute rock perch into a genuine recovery break. Sitpack backs every product with a lifetime warranty and ships worldwide. If you are ready to stop roughing it on your breaks, browse the full range at sitpack.com.
Take 5–10 minute micro-rests every 30–45 minutes on moderate terrain, and every 15–30 minutes on steep or technical trails. Adjust based on your fitness level, weather, and how your body feels.
Lie down on flat, sheltered ground and elevate your feet above heart level. This lowers your heart rate faster and improves circulation better than sitting upright on a rock.
Breaks longer than 20 minutes risk your body entering a physiological “done for the day” state, making it harder to restart. Keep longer breaks purposeful and capped at 20 minutes when possible.
A lightweight folding stool or foam sit pad insulates you from cold ground and prevents stiffness. Look for gear under 1 lb with a setup time under 60 seconds for practical trail use.
Consume 20–25 g of protein and 0.8 g/kg of carbohydrates within 45 minutes of finishing. Good options include eggs on toast with a banana, chocolate milk, or a high-calorie trail meal.